Eighth Bassoon Lesson, Part 2
Eighth Bassoon Lesson, Part 2. Dynamics and embouchure positions. Studies by A
Tune a Day and Rubank. By Terry B. Ewell. BDP#198.
www.2reed.net/bdp.
<Intro
Music: “Home Sweet Home” from A Tune a Day,
lesson 29 number 6.>
Now let’s talk about playing
quietly on the bassoon. In my first days as a student I had a lot of trouble
playing quietly. Teachers told me “don’t pinch the reed.” They were right, this
doesn’t sound very good.
<Example sound with the reed
pinched>
I agree, we shouldn’t do that!
But how do you play quietly
without closing the embouchure on the reed. Well, actually you do need to close
the embouchure on the reed. You need have the proper balance of air and
embouchure in order to play quietly. Here are a few steps that will be most
helpful for students to play quietly on the bassoon:
1) A
good sound will always have maximum air flow. Always support the sound well.
2)
When you close the reed with the embouchure, consider cushioning the reed
more—putting more lip surface on the reed.
3)
Also pulling the reed out of the mouth slightly will also dampen the reed and
give it a darker sound.
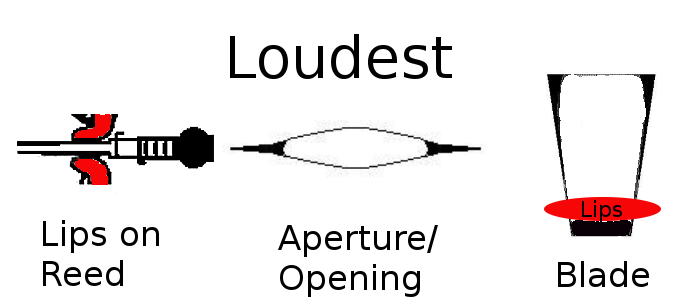
Let me explain a bit more how the
surface area of the reed, the vibrating portion of the reed affects the volume.
Think of the reed as a noise maker. The more you have vibrating, the louder the
noise. The more surface that is vibrating, the louder the reed will become.
In this figure I have the lips
placed very close to the first wire. This means that almost all of the reed
blade is vibrating. Where the lips are in contact, however, the vibration is
dampened. But most of it is vibrating with the exception of the edges of the
blade—the rails—are not vibrating. You can see that the aperture is very open
here. It is only the very edges, the corners of the reed blade that are not
vibrating.
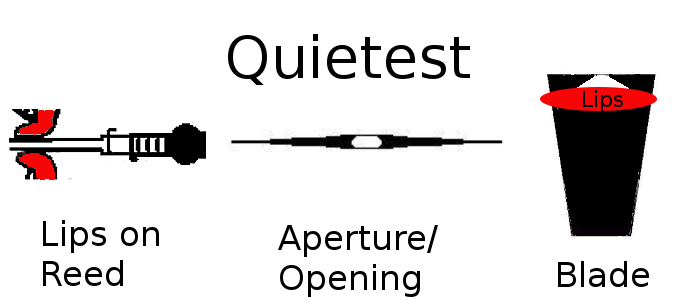
Now here is an example of the
least vibrating area of the reed. The lips are slip right up to the edge of the
blade where the aperture is. So everything beyond the lips towards the first
wire receives some dampening. We only have the portion of the reed that in the
front of the lips, the portion inside of the mouth that is vibrating. With the
lips pressed down a little bit more you can see that that the aperture is very
small. So it is only in the white area that we see vibration. You see dampening
for the rest of the reed.
There is a contrast between the
two: The least vibrating area where the lips are towards the tip and the most
surface area vibrating where the lips are toward the first wire.
Now the normal position of my
lips on the reed is more toward the middle of the reed. This allows me to change
the timbre and by altering my lip position a little bit I can also change
volume. Earlier in lesson 8a, in the Weissenborn page 12 you could see how I
changed my lip positions a little bit on the reed and therefore alter the
dynamics and the timbre of the tone.
<Example from Weissenborn, p. 12>

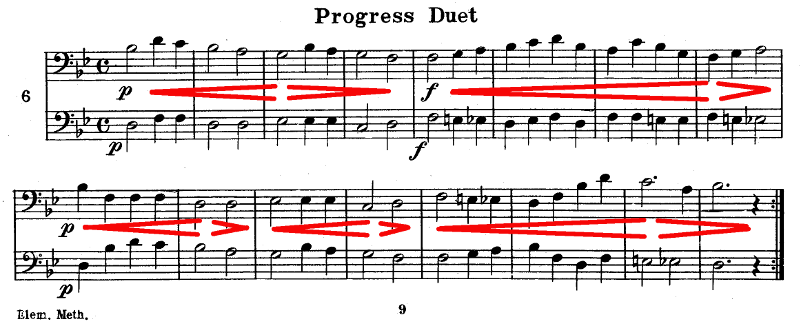
Now, let’s apply the concepts for
dynamics and musicality to this duet from Rubank’s
Elementary Method. This is lesson 8
number 6.
I will use the musical shaping
that I have given in red.
<Example, Rubank
Lesson 8, #6>
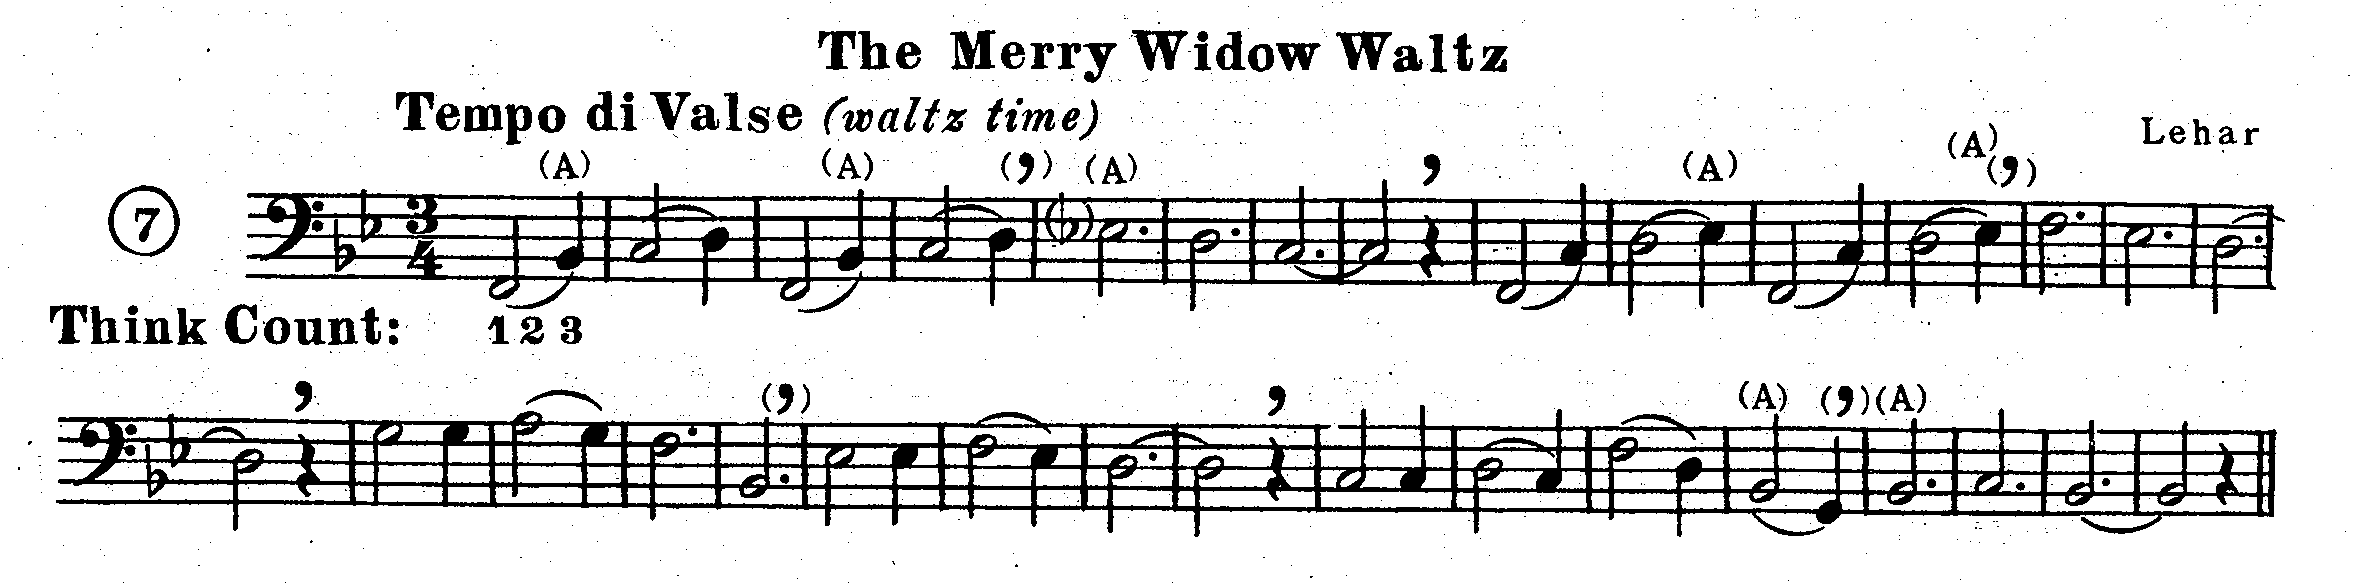
Now in
A Tune a Day lesson 21 number 7 let’s
practice some more phrasing. It at all possible, don’t breathe after bar 4. It
is easiest to play this play this composition more in 1 than a slower 3.
What a lovely song that is. One
of the things I like most about A Tune a
Day is that it has some beautiful melodies from the European and American
traditions. It is just enjoyable to play some of these beautiful melodies.
<Closing
Music: “Home Sweet Home” from A Tune a Day,
lesson 29 number 6.>
Copyright (c) 2016 By Terry B. Ewell. All rights reserved.